Post your news on Inside AHS
Inside AHS is the best way to get your news, announcements and event promos out to our college—and we’ve made it easy.
Post any recent news or announcements about yourself or your program. And for those of you who feel that sharing news is too “braggy,” remember that the AHS community wants to share in your success. Let’s celebrate you!
Step 1: Add a new news item
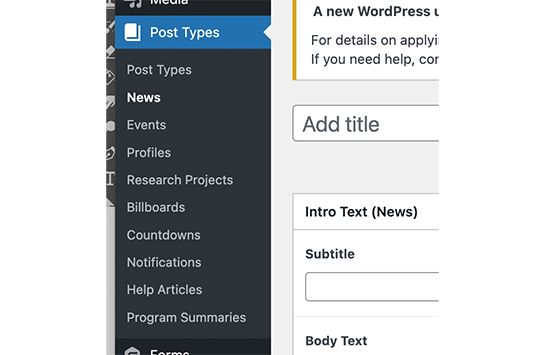
Once you’re logged in to Inside AHS, click on the “My Sites” link in the upper left-hand corner and select “Inside AHS.” Then click on the “Post Type” link on the left-hand navigation menu. Then select News from Post Types list.
Step 1: Add a new news item

Then click on the “Add New“ button right next to “News” at the top, left-hand side of the page.
Step 2: Fill out the required fields
There are only a few required fields when posting news and announcements. Let’s cover those first.
Step 2: Fill out the required fields
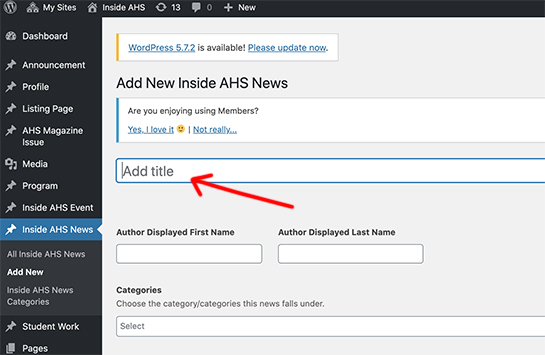
Title
This is the main title of your post. Make sure you add a title that’s descriptive. Example: “Chancellor’s Undergraduate Research Award applications open now” is more effective than “Chancellor’s Undergraduate Research Award.”
Styling tip: No need to capitalize every word in the title! Use sentence case, and don’t include ending punctuation.
Categories

Categories
Click in the category text box and a drop down list of category options appears. Choose the category/categories that best describes your news or announcement.
Sub Title

Sub Title
The subtitle for the news item can be used to provide a quick sentence or phrase to describe the highlight of the article.
Body Text

Body text
This is the main body of your post. To add text, scroll down and find the “Body Text” field. Click the button that says “Add Content Component” and a pop-up menu will appear.
Teaser text

Body Excerpt for Teaser
Teaser text shows up below your news title on our Inside AHS News Archive. Enter your teaser text—one sentence is ideal—in this field. Example: The story “Shane Phillips awarded $419,700 NIH research grant” has teaser text of “Phillips and fellow researchers to study effects of binge drinking in young adults.”
Styling tip: No need to capitalize every word in the title! Use sentence case, and don’t include ending punctuation.
Author
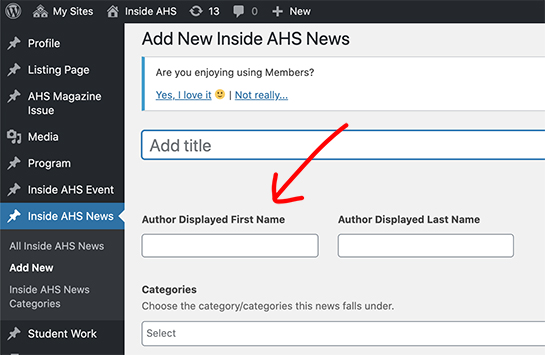
Author
Enter your name or, if you’re posting on behalf of someone else, enter their name. This will display at the very top of the article, so anyone reading knows who to contact if they want to know more.
Step 3: Fill out optional fields
Title, author, category, teaser text and article text are the main pieces of news—if that’s all you want to complete, you’re done and can publish now! If you want to go a little further, read on.
Step 3: Fill out optional fields
Visual element
Have a good photo to accompany your story? You can add a header image, video or slideshow by clicking “Add Visual Element“ and choosing the appropriate component.
To upload an image, click the “Image,” which will generate the image component. Click on “Add image” button on the component then simply drag and drop your photo from its location on your computer right on to the “Select Image” window. It should appear in the gallery with a blue checkbox and border, and also show up on the right side of the gallery. At the bottom right of the Select Image window, click the Select button. Your image must be at least 1440 x 786 px. Need help formatting your photo? We can help. Remember to include photo credit e.g., “Photo: Jane Doe.”
Visual element
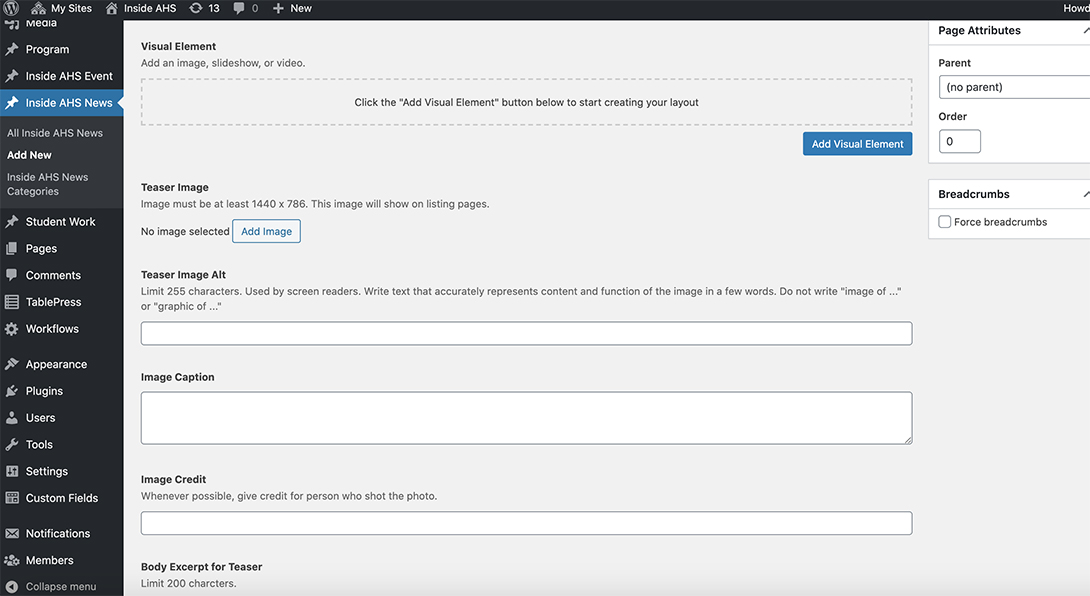
To include a video, just paste the URL or ID of the video from YouTube, Vimeo, Flickr, etc. Add a caption if you’d like!
Teaser Image
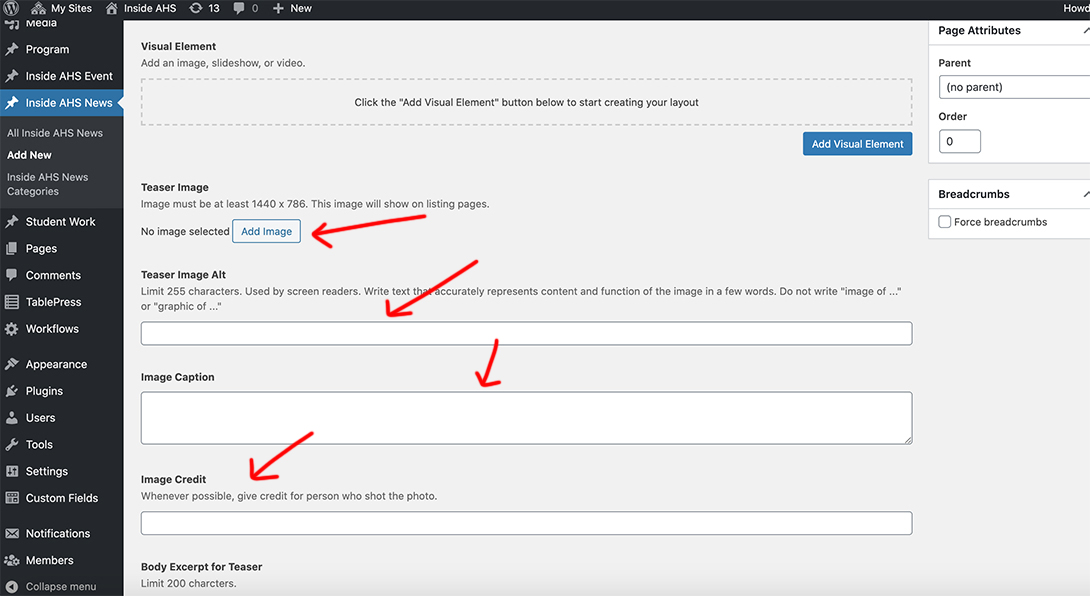
Teaser image
Images can also be included as a teaser to show in the Inside AHS News Archive. Follow the same steps above to upload one here. Remember to complete the “Teaser Image Alt” field to comply with accessibility guidelines, include an “Image Caption” and attribute the photo by filling in the “Image Credit” field e.g., “Photo: Jane Doe.”
Step 4: Publish
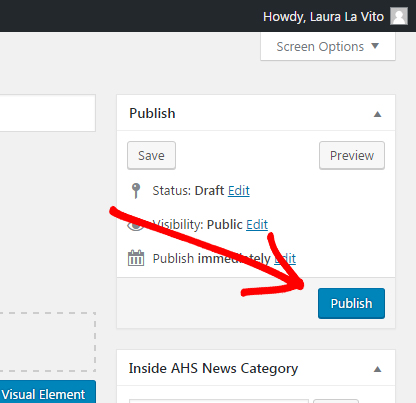
All set? Scroll back up to the top of your page and look for the Publish box in the top right.
Just click the “Publish“ button in the upper, right-hand area of the page and you’re all set!
You have the ability to publish changes to your posts any time you’d like. If you’re updating after the first publish, that button will instead say Update.
Note: Your post will not be immediately visible. To keep our site as fast as possible for the end user, there’s a waiting period while our site looks for new changes and publishes them. In general, new posts are visible within 1-2 hours, but changes can sometimes take up to 24 hours.
If you think something went wrong and your changes didn’t go through, let us know!